Thursday, January 31, 2013

Valentine ATC


I admit this atc is a lot like the previous one but dealing with my mother's health issues hasn't left a great amount of time for being creative so I have to go with what I have.

As before I covered the back with washi tape and added a die cut medallion.  The pink border is punched and I embellished with a prima flower and narrow satin ribbon.  The image is matted with silver.

Wednesday, January 30, 2013

Pretty Pop-Up


 There's something nice to be said about a card that had a little extra something on the inside so it's a treat to open it.  Yes, I cut that pop-up using my new Cameo which made it quick and easy.  The letters were cut out of designer paper and adhered for color and contrast.

The front of the card has wide satin ribbon on the background then a die cut frame in black.  The white center was folder embossed and I added narrow satin ribbon before adhereing it.  The polka dot heart was cut with my Cricut and I added a small ribbon bow to it for a little dimension.  Gotta love a pop-up!

Tuesday, January 29, 2013

Vintage Valentine


I line making valentines and tend to go with tradition - red, pink, black and white with ribbon and lace.

This is an atc that started with washi tape adhered to cardstock.  I added a small die cut doily through which I ran a patterned silk ribbon and a narrow ribbon.  I tied the ribbon in a bow in the center of the doily.  The image came from my stash and I bordered it with green cardstock.  Sweet.


Monday, January 28, 2013

Newest Member of My Crafting Family


I've mentioned that I got a new electronic cutter and here's the proof.  It's a sleek, modern-looking item and it does wonders.  I was perhaps a little over-confident having owned another brand of cutter   but I didn't hesitate to contact the online support department when I ran into a difficulty.  And there is an excellent formum full of helpful information, too.  I still have a lot to learn and try but all in good time.  We are already good friends (I refer to the machine, not the support people or forum folks).  

Sunday, January 27, 2013

The Lasl of the Flowers


This is the last of the flower photos.  I can pretty much guarantee it because the flowers are no longer looking so spiffy.  This is a closeup of the center of one of the flowers and I touched it up with the "poster edge" filter in Photoshop Elements.  If I were a fiber artist, I'd try to duplicate the look in a wall hanging.  Isn't it amazing that nature can produce such a wonder?!

Saturday, January 26, 2013

More Flower Study


Although I have a fancy Canon Rebel camera, the flower photos I've been showing were taken with the little Canon Powershot that I carry in my purse.  It goes to show that you don't have to have an expensive camera to get some interesting photos.

Know what I did to this one in Photoshop?  Almost nothing.  I liked the softness and thought the light was just right so I resized it and that was about it.

Friday, January 25, 2013

Hearts


Because I'm playing with my new cutter, its easy to create some valentine pieces.  This heart is an example.  I used the same cut file to cut both black and red and then took them apart and reassembled.  The white heart was added as an extra embellishment.  The bottom of the card front is folder embossed, the black is designer paper and I added a thin satin ribbon between the two.  I thought it was rather striking.

And as soon as I finish cutting pieces for the grands to use for making their valentines, I'll get make to making more cuts for myself.  Fun, fun, fun.

Thursday, January 24, 2013

Unopened Flower


I returned to Sprouts and it was a more pleasant experience this time.  We took our time browsing and the checkout line moved right along.  For tomorrow's breakfast I'm going to thoroughly enjoy the lemon poppyseed muffin I purchased.
But I didn't need to buy more flowers because the bouquet I purchased last week still looks great.

This flower (from that bouquet) doesn't look like it's going to open but it's still pretty.  I like the contrast between the orange and the wine color and I used a Topaz detail filter in Photoshop Elements to bring out the fuzziness that is on this stem and wine-colored petals.  The small photo doesn't show it really well but you can see some of it.  And I thought a frame in the same wine color completed the picture.

Wednesday, January 23, 2013

Filagree Frame


There's a couple more flower photos to share but we'll take a break from that and I'll show you another greeting card.  I got a new electronic cutter and it's pretty great.  Even intricate cuts like this usually come out very well.  There are iridescent stripes on the background paper that add a nice touch and I embellished with light green silk ribbon and pink flowers.  The bigger flower is punched and the small flowers are Prima.  The image is more yellow than it should be but it still works.

Gotta love those cutters!

Tuesday, January 22, 2013

More Flowers


I had some stamping time but since I hadn't stamped in a while I spent more time than I liked just "spinning my wheels."  But I got several things started that hopefully I can finish in the next few days and I'll have different things to post.

These flowers are from the same bouquet as the flower I showed yesterday.  I really like the varigated colors in the left flower.

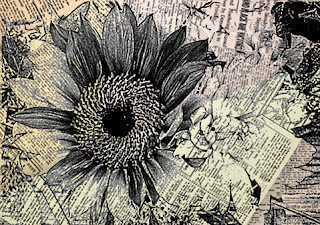
I made a "pen and ink drawing" of the flowers using a Photoshop Elements filter.  I deleted all of the white area from the drawing and copied the gray and black onto a transparent background.  Then I put it on a newspaper background.  I thought it turned out pretty cool.  I think I should print it out and include it on a journal page.

Monday, January 21, 2013

Indoor Sunshine


A new Sprouts store opened in town and we made the mistake of going to the Grand Opening last week.  I say mistake because there were people everywhere and even without a cart it was difficult to get around.  But it looks like a great store that carries beautiful produce and I'm hoping they have more cheese than what I was able to see on my first visit.  (A person can't eat too much cheese.)

We bought a few things including a bouquet of flowers.  They are especially nice because they are a bright spot in the living room, a real treat for the eyes and spirit when it's so cold outside.

I took a few photos of the flowers.  I blurred the background on this one and did a touch of "poster edges" on the flower.  That's one of my favorite filters in Photoshop Elements.

Sunday, January 20, 2013

Circular Trees


I like these little graphic trees but haven't put them to a lot of use so a "winter forest" theme seemed to be a good time to let them shine.  I cut the blue circle and ripped some white cardstock for snow.  I silver embossed the trees twice, once on dark blue cardstock and again on the snowy scene.  The dark blue trees were cut by hand and adhered in black on the card.  I cut the edge of the blue circle and mounted it on silver then added some die cut silver stars to the sky.  The white swirl background is folder embossing and the tag is a die cut.

Now to try those trees in a spring or summer setting.

Saturday, January 19, 2013

Red Birds


I silver embossed the tree image on black cardstock.  The little birds were stamped and cut by hand but I'm looking for a file for my electronic cutter that will cut little birds for me.  The black is mounted on silver and red and adhered to light blue cardstock.   I envision snowflakes being blown from the threes.  brrrr


Friday, January 18, 2013

Winter Wonderland


With pain in my neck from muscle spasms it has been difficult to get much done but I'll share with you the cards I made for our stamp club exchange.  The theme was "winter forest."

This is two images from Hero Arts.  The background was stamped with gray ink and the foreground tree was embossed in silver.  I mounted that on silver cardstock and added sparkley ribbon and narrow satin ribbon as embellishments.  It's quite striking.

Thursday, January 17, 2013

More About Our Tea Time


As mentioned in a previous post, High Tea at our local Augusta's Tea Room was very enjoyable and especially when shared with my good friends Alison and Judy.  I wanted to share a couple more photos with you.

The theme of the room is "secret garden" and we were seated on a raised platform that overlooked the rest of the room.  It was a fanciful setting with brick walls painted in a pastel grunge style and glass birds perched on branches throughout the room.  Tiny white lights added to the fantasy feel.

Not only was it a fun atmosphere, the food was wonderfully delicious and plentiful.  Augusta does a very nice job and even presented us with little favors at the end of our dining.

We're ready to go again!

Wednesday, January 16, 2013

Timely Trading Card


"Time" seemed to be an appropriate theme for a January atc.  This one started with a collage image clear embossed on kraft paper.  I sponged Distress Ink over the top and added a clock brad (isn't that cute?!) and a silver clock hand.  I embossed the numbers on silver and punched them out.  That whole piece was mounted on silver cardstock.

Tuesday, January 15, 2013

Pyramid in Brown


Here's a pyramid dressed up in brown and light blue.  The background is patterned paper and I embellished with punched butterflies and flowers.  There also a touch of light orange for contrast.

Monday, January 14, 2013

White on White


I find white on white to be quite elegant and decided to use it on one of my calendar pyramids.  I added some folder embossed triangles and embellished with die cut flowers and a punch butterfly.  Thought about adding a touch of color but decided I'd leave that to the little calendar.

Sunday, January 13, 2013

Tea Time


 Judy and Alison joined me for High Tea at Augusta's Tea Room last Thursday and we had a most enjoyable time.

There was an elegant assortment of treats and more than we could eat.  Scones came in two flavors and there were multiple flavors of beautiful cookies.  The gingerbread cupcakes made a nice ending but perhaps our favorite of all was the creamcheese/rosemary/nut sandwiches.

The assortment of fruit was also tasty - flavorful strawberries, juicy green grapes and sweet cutie oranges.

Alison enjoyed cinnamon tea while Judy and I shared both a pomegranate and caramel,  pomegranate our favorite by a wide margin.

It was a fun experience and one everyone should try when in Grand Junction.

Saturday, January 12, 2013

Gray Calendar Card


Here's another of my calendar cards.  I did this design because I wanted to use some of the paper in my new Bright and Basic Pad of Recollections paper.  I wouldn't cal the gray label bright nor basic but I liked it for this purpose.  I paired it with gray and cranberry cardstock and added ribbon and a button accent.  The small flowers are punched.

Friday, January 11, 2013

Lotsa Pasta


If there's ever a serious food shortage I think I'll head on over to Noodles & Co.  After we placed our lunch order there this week I noticed their supply of pasta and it looked very adequate to say the least.  But I may have to branch out and try something besides their Pad Thai.

Thursday, January 10, 2013

KaleidaCam


I have a new app on my iPhone called KaleidaCam and it is a lot of fun.  You can choose from a variety of patterns, though I tend to prefer and stick with the traditional "pie wedges."  The app opens the camera and you rotate and change the pattern by pushing on the iPhone in a clockwise or counter-clockwise circular motion.  When you get a pattern you like, you can save it as I did here.  This is design includes our Christmas tree.  Pretty unique.

Wednesday, January 9, 2013

Snowflakes Everywhere


The freezing weather has me in the "snow mode."  The snowflakes are embossed in white or silver and one big punched snowflake.  I added some glitter to make it sparkle.  The flag is stamped and I added small hearts for embellishment.  For a little dimension I added clear glaze to the hearts.  Now that makes me think of valentines!

Tuesday, January 8, 2013

Calendar Trading Card


 Since I had enough mini calendars, I decided to incorporate some of them into  trading card designs.  The white strip is embossed and I added a decorative border to the edge and also added some narrow satin ribbon.  I found the flowers in my stash and just twisted them together and spiraled the ends.  I adhered a big ribbon bow behind the flowers and added the calendar.  Easy peasy.


Monday, January 7, 2013

Calendar Pyramid


I received a card similar to this from a friend in Alaska.  Thanks, Sue!  I thought it was pretty great so I made some of my own.  It's two pieces of brown cardstock and I used patterned paper to mat the triangles.  Butterflies and flowers are punched.  You may later see variations of this card as I need to get more made.  And, by the way, they fold flat for mailing though they require a 5" square envelope.

Sunday, January 6, 2013

Let It Snow


Snow in Grand Junction doesn't normally last as long as it has this winter.  We don't have a lot but it's sticking around because of our cold temperatures.  We like to have it snow, especially in the mountains because that is the source of our water and the skiers love it.  We can esaily dispatch the snow because my husband has a snowblower to  remove it from the driveway and sidewalk.

I used my electronic cutter to remove the letters from the front of this card.  The snowman is stamped and cut out but I added his arms with a black marker.  The snowflake is die cut and I hand wrote "let it."   

Saturday, January 5, 2013

A New Year Full of Promise


I try to not post cards on my blog until they have been sent and received but I've spent so much time either at the hospital or nursing home with my mother  in the past few weeks that I've had little opportunity to be creative so I have to make an exception.

In January I traditionally make cards that incorporate a small calendar that can be used all year if desired.  This one started with a striped background paper printed from MDS2 by Stampin Up.  I used my electronic cutter to cut the flowers in a coordinating color and the leaves are die cut.  Flower centers and the red scalloped edge are punched.

I really need to get to the studio to create more cards so I can get them in the mail.  Mom is settled in for now so it should be possible.

Friday, January 4, 2013

Baby It's Cold Outside


Brrrrrr!  We continue to be colder than Anchorage AK but when we discovered that the small town in south central Colorado where we went to college was -44 degrees, we figured we shouldn't complain too much.  My sister-in-law and I reminisced that during our college days we were required to wear skirts or dresses to class until it reached a specified temperature.  We couldn't remember what that temperature was, but it was pretty low.  And the valley had an almost perpetual wind that blew that cold right through the body.  Yikes! I'm amazed that we endured it without the aid of the modern fabrics and layered coats now available.             But about this card . . . The tree was stamped with Versamark ink and then I brushed over it with silver Pearl Ex for shine.  The snowflake is a die cut.  I cut the snowperson using my electronic cutter (did an entire family) and the snow is a layer of white cardstock.  I embellished with some twine tied in a bow.  I bet that carrot nose is frozen solid!


Thursday, January 3, 2013

Label Embellishment


I made this card using a small pad of patterned paper.  The flowers and labels are die cut.  The flower center is a punch and a faux jewel and punch.  I embellished with ribbon tied in a bow.