Wednesday, May 30, 2012
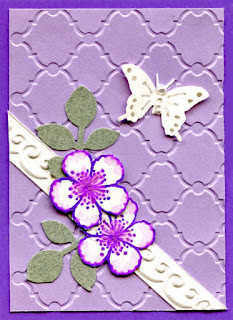
Tagged No. 2

This is the same tag stamp that I used on the card I posted on Monday.  This time I inked the stamp with two colors of Distress Ink and spritzed it with pearlized water.  The flower and flourish design was completely gone so I added my own flower and flourish using black ink.  The black background strip is folder embossed and the border is punched. I adhered the tag to silver cardstock and embellished it with silver thread tied with a black bow.  I added dimensional silver paint to the centers of the border punch.

Tuesday, May 29, 2012

Poppy Play


This is another poppy in my yard.  The photo above is the original photo.

I opened the photo in Photo Effects Lite and applied a "gamma" effect for the rich color in the second photo.

Then I opened the gamma version and added a "poster edge" filter for the detail in the last photo.

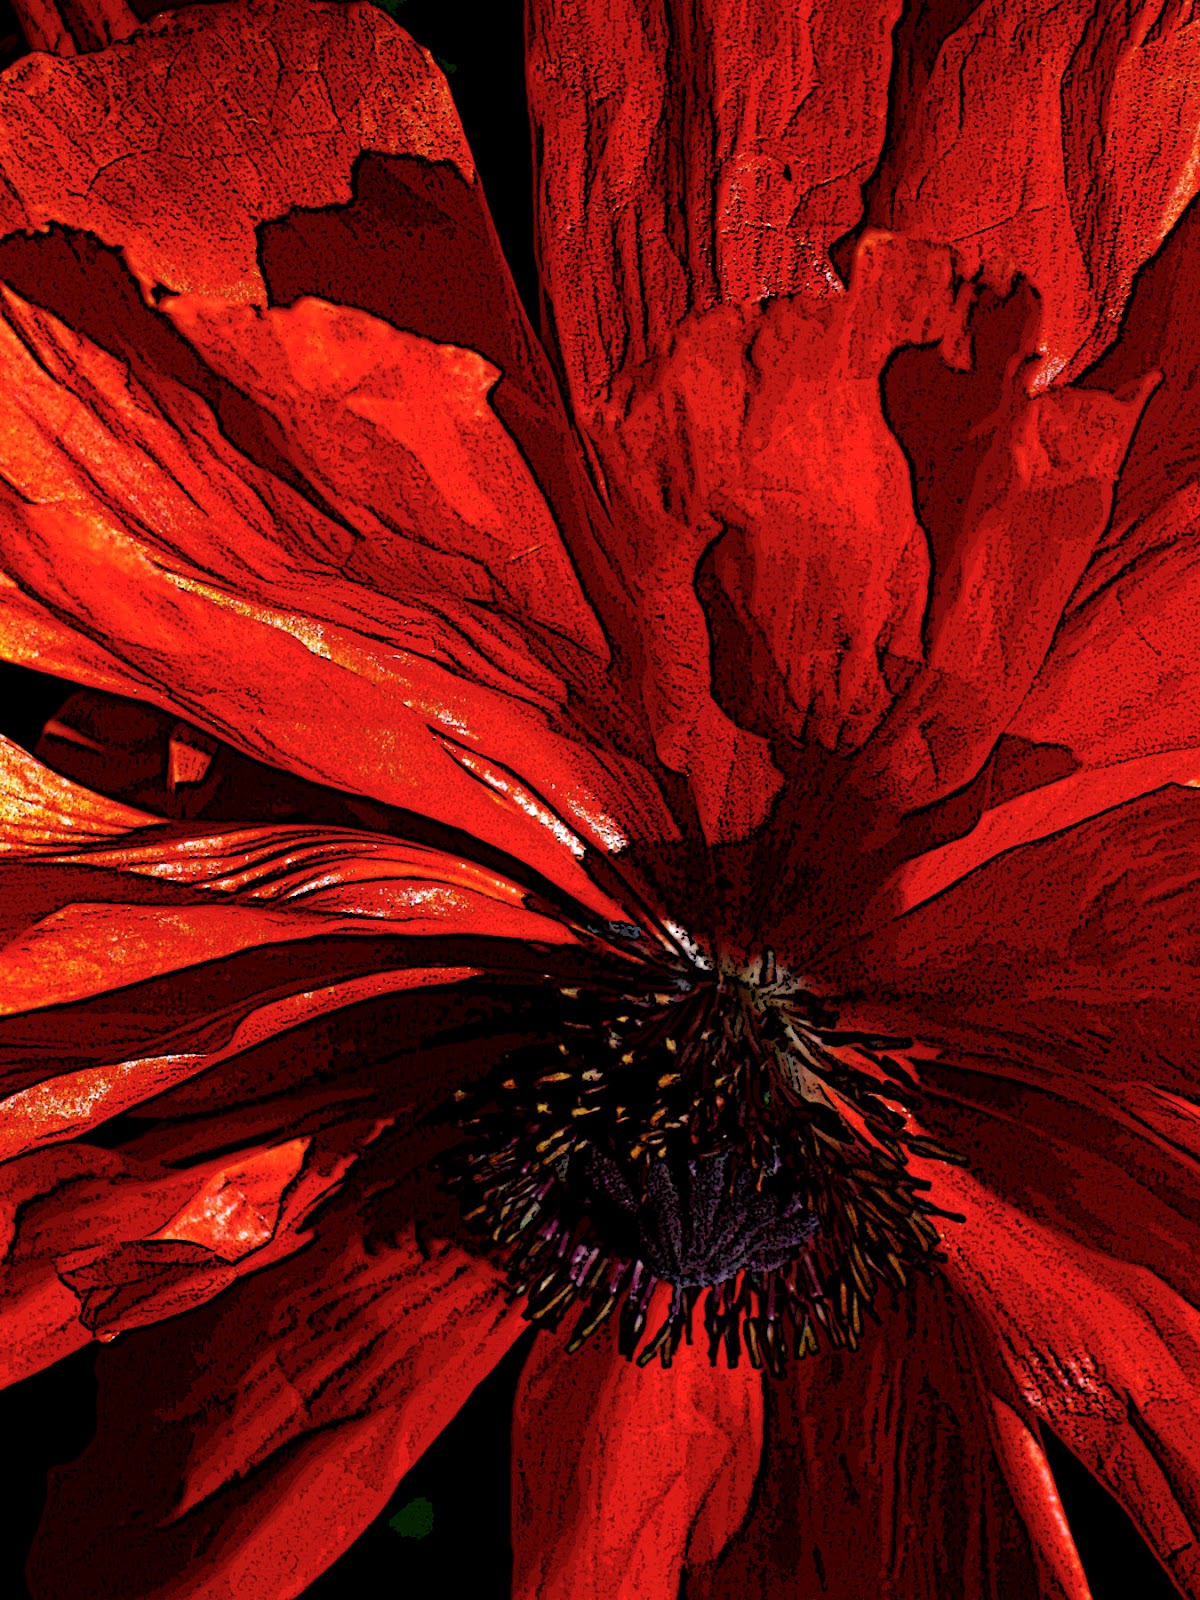
This stuff is fun to play with and you never know what the end result will be.

Monday, May 28, 2012

Tagged

Once in a while I buy a stamp set and can't quite get around to putting it to use.  This tag was from one of those sets - a collection of tags.

I black embossed the tag onto white cardstock and added punched flowers to the stamped flowers.  The red background is folder embossed and the butterfly is punched and has a faux jewel body.  To finish it off I strung some fibers through the hole and tied them in place with a red bow.

Friday, May 25, 2012

Pink and Yellow


Honestly, I'm not very fond of this card.  I was determined to use the yellow strip that was punched some time ago but not used.  I added punched flowers to the center and added a punched border at the bottom.  I punched a bunch of yellow flowers to add to the border.

Perhaps a different color scheme would have been more effective.  Hmmmmmm

Thursday, May 24, 2012

Poppy


Although I didn't have as many poppies bloom as is usual, those that I had sure added a bright spot to the garden.

The photo above is the original, a blossom taken from the back or stem side.  Then I opened it in Photo Effects Lite and added a comic book effect.  I like the dotted texture and varied colors it added.

Wednesday, May 23, 2012

Leftover Chevrons

These die cut chevrons were left from another project and I grabbed them up after challenging myself to use up some leftover pieces.

I adhered the green chevron on top of the yellow in a way that let only a bit of the yellow show.  The flower is die cut and was also leftover.

Can't get much more simple than this but I thought it was an effective design.

Tuesday, May 22, 2012

Chickens & Hens


My chicken and hens plants did so well they needed to be thinned but before I did that, I snapped a photo.


Then I used Phto Effects Lite and the kaleidoscope effect to create the second photo.  How fun is that?!

Monday, May 21, 2012

Solar Eclipse - Wow!


It's rather exciting stuff to be able to see an almost total solar eclipse as we did last evening.  I can remember only one other in my lifetime (though my husband tells me I've seen three).  We weren't in the best path this time but what we saw was still amazing.  The photo below shows it at as close to its peak as I could get.

Also interesting were the shadows created.  The photo on the right was the sun shining through an ash tree onto the garage door.

Wow!  When do get get to see the next one?!!?

Friday, May 18, 2012

Hexed Again

This is another design I made using hexagons.  This time I used a variety of sizes and embellished with die cut and punched flowers.  The centers of the flowers are faux jewels.

Thursday, May 17, 2012

Flutter By

This artist trading card coordinated with a greeting card that I made.  The background is embossed using a folder as is the cream strip.  The flowers are stamped and the butterfly and leaves are punched.  I add little spots of glitz with a pen.

Wednesday, May 16, 2012

Hexed

I havet a new die shaped like a hexagon and have had some fun using hexagons in designs.  This card is embellished with flowers and leaves cut on my electronic cutter.  Faux jewels add a little glimmer.

Tuesday, May 15, 2012

Morceaux Cheisis

I have no idea what that text means but I like it.  I stamped text that fit nicely on the lines of the background paper.  The clock is a Seven Gypsies image and the flower is die cut.  I added a photo corner and some fiber to complete the design.

Monday, May 14, 2012

Marquee Card


I created several "marquee" cards.  They take a little time due to the many pieces but I think they are a little different.  As you open the card, a "curtain" pulls back and the center image is revealed like a little bit of magic.

The borders on the front are from an embossing folder.  I used patterned paper and die cut the butterflies.  The flower is stamped and the leaves are punched.

Friday, May 11, 2012

Flip-It


This is a front or closed "flip-it" card.  It is easy to create one using the Sizzix die which is available in four or five different shapes.  I added strips of kraft paper (one punched for a decorative edge) and patterned paper.  The flower is a die cut and the text is stamped.  I drew hand stitches around the edge of the frame.

When you pull it open, it "flips" and you see the back of the frame.  I added a smaller frame which I die cut from white and stamped with text.  I inked the edges and added a punched flower.

I remember making these several years ago but back then they were difficult to cut so it folded evenly.  The die cut makes it a cinch, especially since it scores the folding lines.  It's a little bit of magic.

Thursday, May 10, 2012

"Down By The Marsh"

I stamped this image twice, once on the yellow cardstock and again on a textured gray cardstock.  I cut the circle from the gray, colored it with colored pencil and added a punched flower.  I popped this up on the first image.  I added iridescence to the bird and adhered a punched butterfly.  Simple.

Wednesday, May 9, 2012

Die Embossed Frame


It's subtle but the frame on this card was created with two Nestability dies.  I stamped the text and then mounted the kraft cardstock onto dark brown.  The flowers are die cuts and the leaves and butterflies are punches.  I embellished with a gold brad for the flower center and faux jewels for the butterfly bodies and on the ribbon.  I inked the edges of the flowers, butterflies and leaves.

Tuesday, May 8, 2012

Chevrons & Trading Cards

This is a simple artist trading card that I made after cutting some chevrons.  The base is textureed cardstock and the stem is stamped.  The flowers and butterfly are punched and I finished the design with black grosgrain ribbon and touches from a glitter pen.

Monday, May 7, 2012

Chevrons

I'm laughing at myself for taking the looonnng way around on this card.  I used a zig zag die cut on three shades of green cardstock and yellow cardstock.  I placed them side-by-side and adhered them in place and then cut them into strips.  What I originally intended to do was stagger the different colors for a different look but instead I put them back together the same as they were originally!  I guess you call that a less in futility.  The flower is Tim Holtz's die, Tattered Flowers and I inked the ends of the petals.  The leaves are punched and textured with an embossing folder.  The butterfly is a die cut with ink added and I embellished with a gold brad for the flower center and added strips of narrow ribbon with gold metallic edges.

Friday, May 4, 2012

Flat Die Cut

This is a different type of die cut card for me and I used an idea from Jennifer McGuire.  I first cut the leaves from the patterned paper and then from solid brown paper.  I removed the patterned leaves and replaced them with the solid leaves and adhered both to dark brown cardstock.  I embellished with narrow ribbon, Prima flowers, tiny die cut flowers and faux jewel flower centers.  Simple but different.

Thursday, May 3, 2012

New Old Church


You may remember this photo from an earlier posting. The church is in Leadville CO and is a historic structure.

I revisited this photo and tried some variations in PhotoShop Elements.  One of my favorites is the drawing on the right.

Digital is just fun to play with and you never know what you'll end up with.

Wednesday, May 2, 2012

Window In Leadville


A few months back I posted some of my photos from a trip to historic Leaville CO.  I used this photo of a window to make an artist trading card.  Basically I defined the edges and added a grunge filter.  The result was a photo with more dimension and darker color.

Tuesday, May 1, 2012

Burgundy Layers


This was another design I came up with when making cards for our stamp club exchange.  The challenge was to use at least three patterned papers.  I made my papers different sizes and added a stamped image to a circular piece of plain cardstock.  Embellishments were black brads, narrow satin ribbon and flowers.  I rather liked the end result.  I hope Judy did, too, because she got it in the exchange.